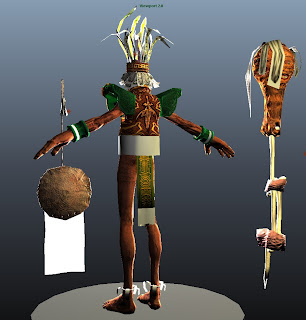
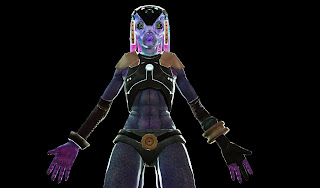
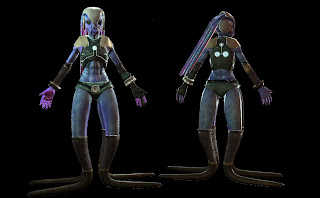
Ocquarian Update 12
I just finished posing the Ocquarian. Here's a screenshot in Maya's viewport 2.0. I will now put this into 3dsmax and use its Scanline Renderer for my final render.
Hypnotik Update 3
Styracosaurus Update 4
Styracosaurus Update 3
I just modeled a base for my Styracosaurus in Maya and Zbrush and textured in Zbrush and Mudbox in 3-4 hours. I need to tweak the silhouette because it's still rough. I'm aiming to finish it today along with all the other bases of my models for my demo reel. The textures for this guy are pretty much complete. Here's a quick screen cap of Maya's Viewport 2.0. My model looks horrid! I can't wait to tweak it in 3ds Max's viewport.
Small Update Down Below. I made the rocks smaller since they made my Dino look like a baby.
Styracosaurus Update 2
The base mesh is at 6140 tris so far. I think I could optimize it a bit more. The tri count image is in Maya's Viewport 2.0. The other render with no wires is in 3ds Max's Viewport. I'm still playing around with lighting up my model in 3ds Max. So sorry that it doesn't look so great now. I'll pose him later on today using Mudbox 2012's pose tools. I actually really like them. Check them out http://www.youtube.com/watch?v=EBQj1ppxnkI
This image down below is a problem I was having with viewing my normal maps correctly in the viewport in 3ds Max. I learned from a thread http://forums.cgsociety.org/archive/index.php/t-983954.html that I needed to change my gamma settings from 2.2 to 1. To change this, go to the menus at the top and then click on Customize>Preferences>Gamma and LUT. There I was able to change the gamma settings.
A Song for my Grandparents
I'm failed to finish on 11/11/11 but here's what I got in almost 3 hrs. Sorry for the mistakes.
Click here to see the video -----> http://www.youtube.com/watch?v=YC_V0PmIpIw
Click here to see the video -----> http://www.youtube.com/watch?v=YC_V0PmIpIw
Hypntoik Update 3
I haven't posted in awhile. I've just been working on Hypnotik's normal map and color map. The screen shots are screen shots from Maya's viewport 2.0. The maps are still very rough but here's what I've got. My workflow has been between Maya, Zbrush, and Xnormal so far. After I get my textures in, I'll head into Mudbox to clean up any seams or troubling artifacts then polish it off. It's been taking me awhile to clean up all the texture maps from all the bakes but hopefully I can get this done by tomorrow.
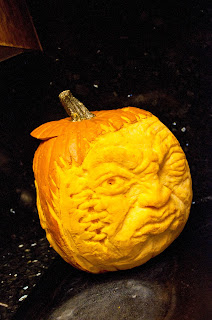
Pumpkin Carving 2011
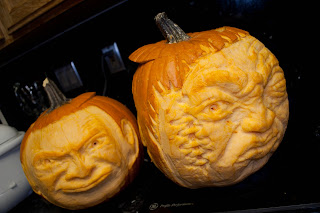
I should be working on my portfolio but I was itching to carve a pumpkin this Halloween. The mother asked me to carve a pumpkin for her work place so she lent me a free pumpkin to carve! I thought I could do this real quick but it ended up taking up about 4-5 hours. I hate it. Oh well... I'm satisfied that I got to at least carve at least one this year. Next year I'll do something way better.
This pumpkin is by cousin Jonathan Jacinto who was carving this pumpkin with me at the time. His carving time was about 2-3 hrs. It was his first time carving a pumpkin.
Here are more images.
Hypnotik - Update 1
I never finished my Dominance War character and never got to coloring it so here's my first color pass! This is not yet textured in 3D. I painted on top of a rendered image in Photoshop. Critiques are welcome.
Mr. Mucha's Head Optimized
I modeled and textured my buddy Regan in the past but I never completed the model. I'm now making a low poly model of him. The current tris count for the low poly is 2996.
Ocquarian Wireframe 2
3 x 1024 maps (diffuse and normal for head, emissive for body)
2 x 2048 maps (diffuse and normal for the body)
Ocquarian Wireframe
I never posted the wireframes for the Ocquarian so here they are. I optimized polycount a little bit more on the very last image if you're wondering. I still think I can optimize but I'll get there later.
Styracosaurus Udpdate 1 - Starting to Paint
I was just about finished sculpting my Styracosaurus a couple months ago but I decided to refine the mesh a bit more for my portfolio. Shorty after refining, I started painting this guy. Here's about an hour worth of texture painting this guy so far. After this, I'll create a game ready mesh of ranging from 7-15,000 tris to bake my texture maps to.
Ocquarian Update 10!
Finished!! For now...haha! Images are once again in Maya's viewport. I still have lots and lots of tweaking to do. I need to fix a lot of the normals and color maps. I still a couple of wonky normal maps but hey look great so far. I will create specular maps later for this character. Now I'm going to get started working on a game ready mesh for my Styracosaurus sculpt! Then texture that big boy!
Also, I based my textures of my buddy Kevin's vehicle for this character!
Ocquarian Update 8
Subscribe to:
Posts (Atom)
